Do you feel like trying something new and different than the “standard” photography?
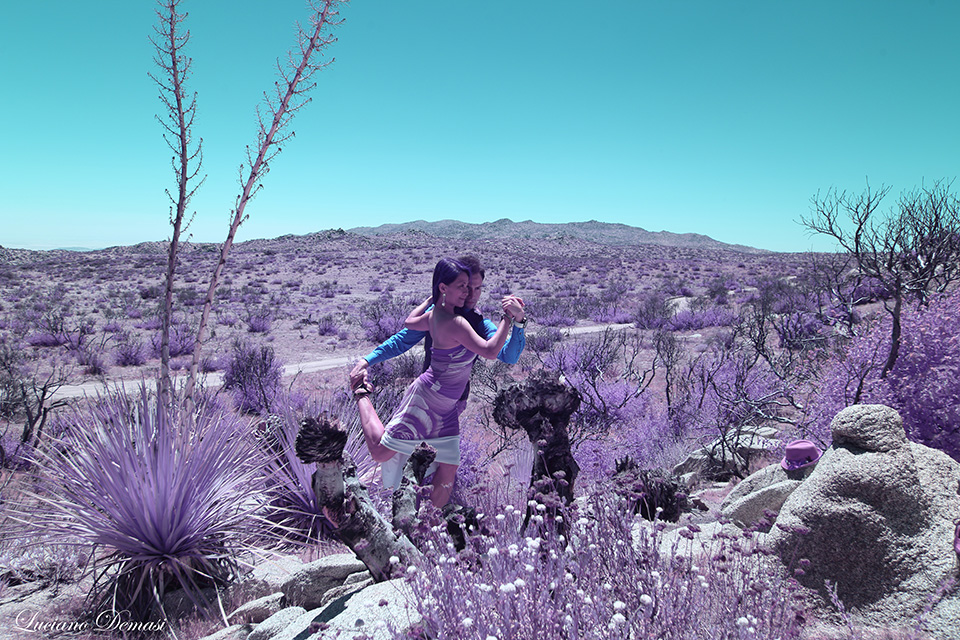
Figure 1: example of what you can do with the Lifepixel’s Hypercolor filter
Then the Hypercolor Infrared filter is just for you (see Figure 1). These tips are designed for the person who is starting to get in love with the wonderful “invisible” infrared world.
This Hypercolor Infrared filter allows the camera to receive light corresponding to a wave length of 470nm and beyond. To simplify, this means that only a portion of the light we normally see with the necked eye actually reaches the camera sensor. However, the “invisible” (but existing and real!) light (the so-called “infrared” part of the electromagnetic spectrum) is “seen” by the camera, so we have a lot of opportunities for incredible effects (see Figure 1). Notice that the camera needs to be modified (topic not discussed here, for more details you can check the website www.lifepixel.com or other companies which professionally modify your camera upon request). This article focuses on how to take (and process) photos with this filter.
Here there are some tips for you. Take a photo (with a modified camera most likely you will not need a tripod) of a scene which contains some vegetation. Better if nearby there are rocks, water, sand…in infrared they will have interesting non-trivial effects!
Plants are the most intriguing objects as you will see with your own eyes after the process is completed.
First of all, you need to use the RAW format (not the JPG!) as output from your camera, so you will have more freedom in postprocessing. You will read in several websites to do custom white balance, to use gray cards and so on. Things appear overwhelmingly complicated. They do not need to be. Just pick any custom white balance setting from your camera and do not care about the appearance you see from the screen. The photo will appear horrible, but do not worry: it is normal!
An example of a typical photo you get from converting to JPG a RAW image is reported in Figure 2.
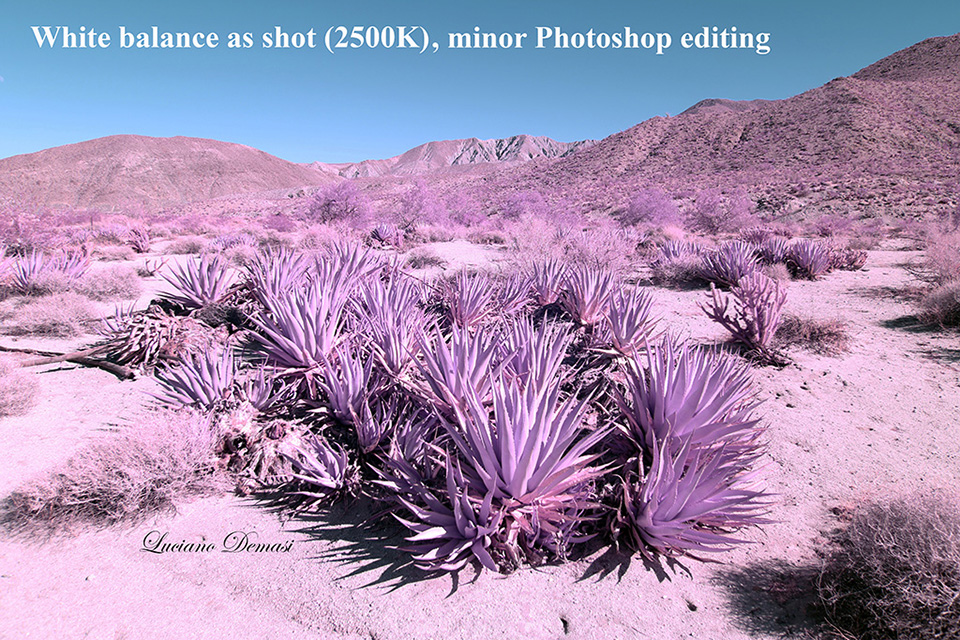
Figure 2
The sky has a nice blue, but the image has a general “pink” tone which looks far from ideal. Do not worry. To overcome this inconvenience, you can change the white balance on the raw file (for this phase I encourage you to use your camera RAW file editor, not a third party software, this is crucial for top final results). After you adjusted the white balance, the exported JPG photo will look like the one posted here in Figure 3.
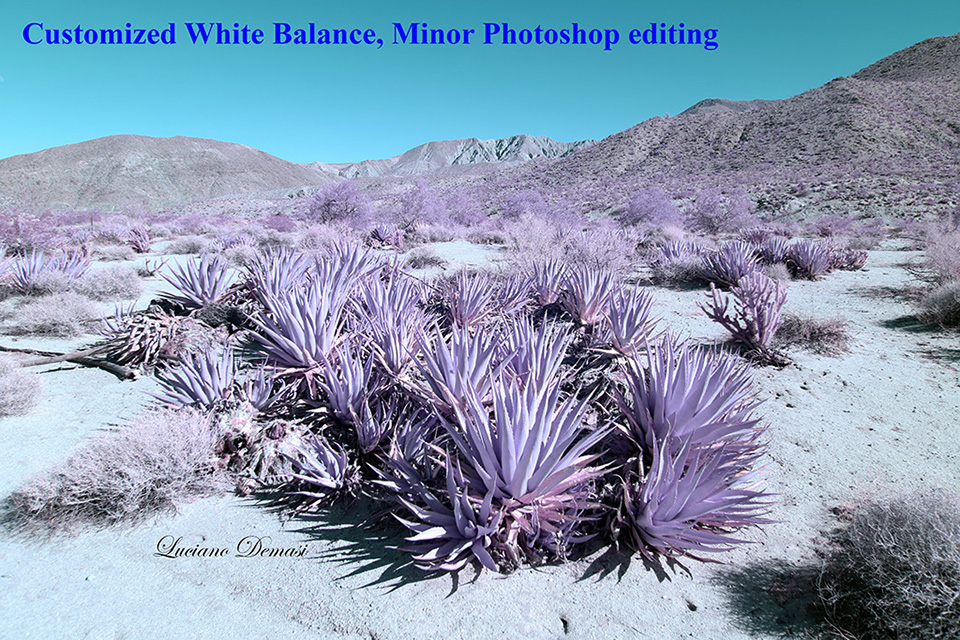
Figure 3
And you are done!
If you like a more “blue” sky you can work with Photoshop and select “Image-Adjustments-Hue/Saturation…” and then change the hue of the cyan.
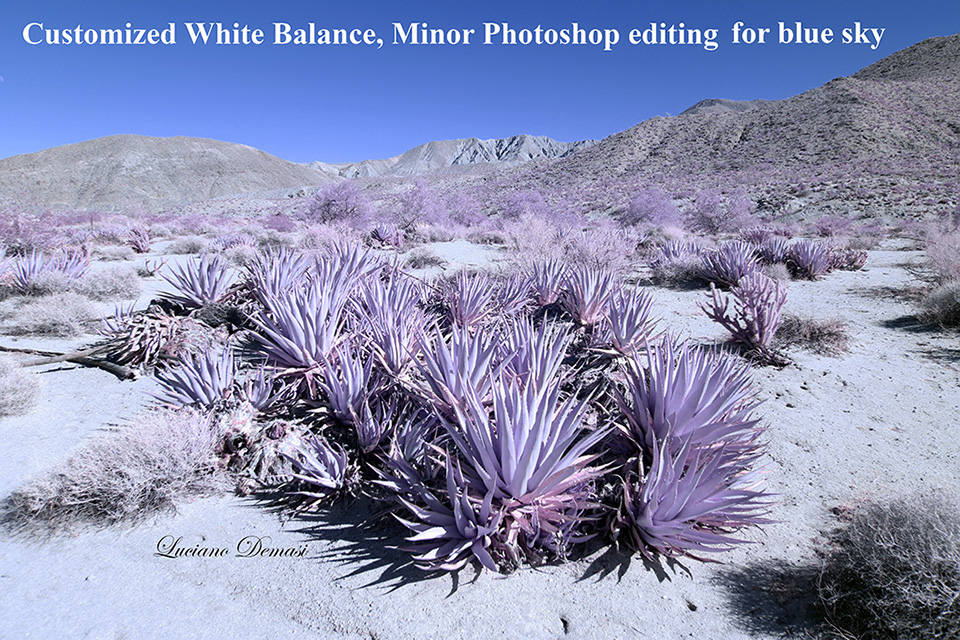
Figure 4
If you are more into the infrared photography or if you like to have fun and explore new possibilities, you can try the so-called “channel swap”. This is now explained. Take the image with the customized white balance (Figure 3) and in PHOTOSHOP select “Image-Adjustments-Channel Mixer”. Select the “Output Channel” to be “Red”. Then without pressing OK, put the number 0 in place of 100 in correspondence of Source Channels-Red, and place 100 instead of 0 in the Source Channels-blue (Figure 5).
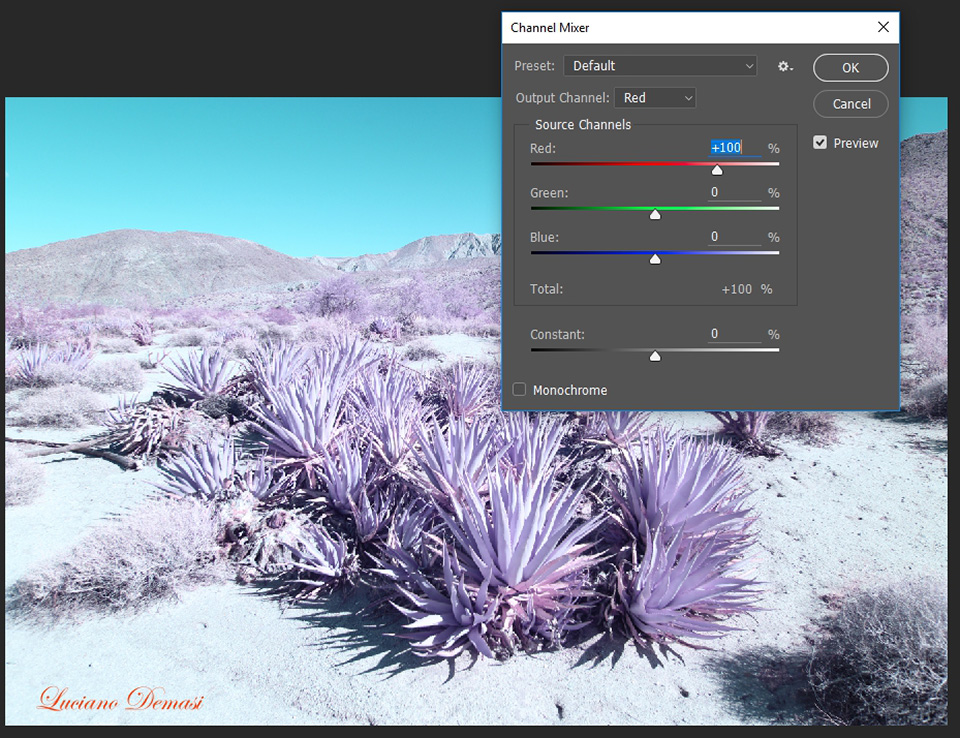
Figure 5
You notice that the image changes color. Without pressing OK, select the “Output Channel” to be blue (Figure 6) and put 0 in correspondence of Source Channels-Blue and 100 in place of Source Channels-Red.
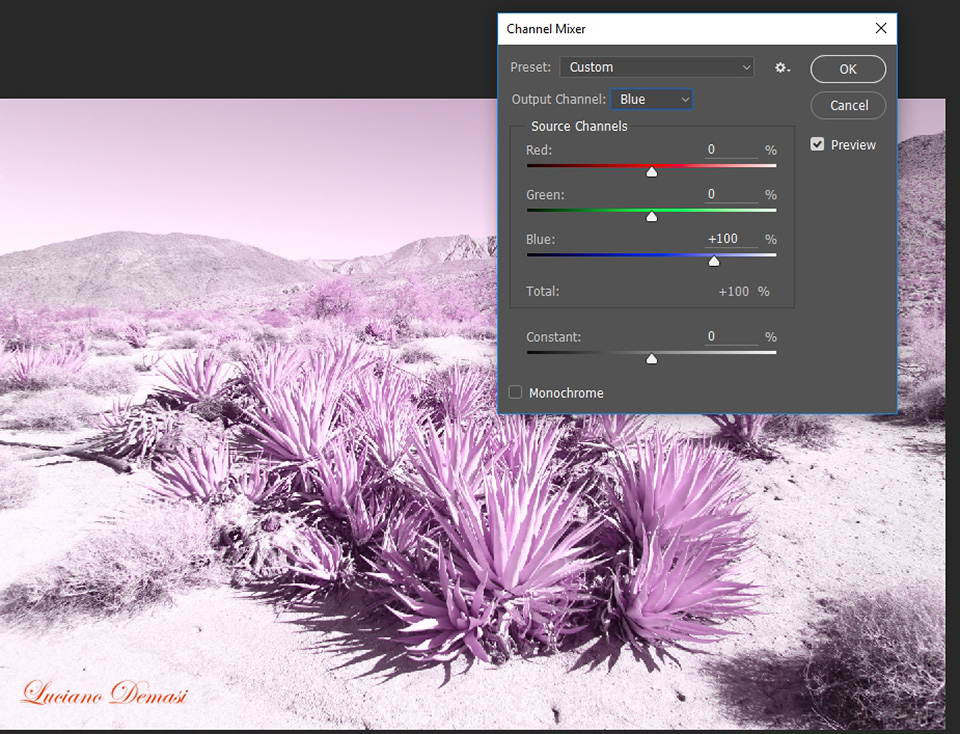
Figure 6
The result of this channel swap is Figure 7.
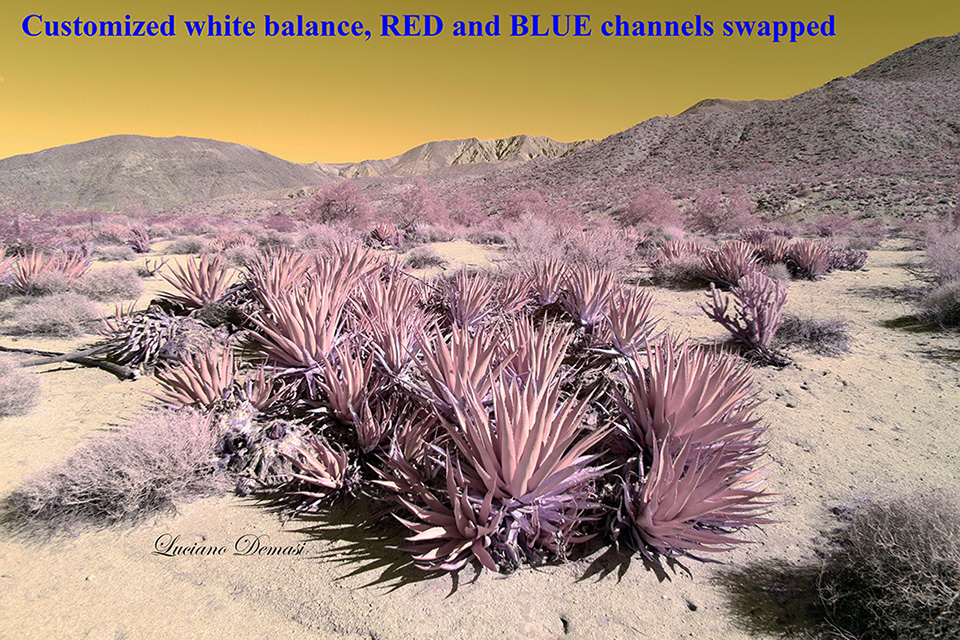
Figure 7
Which looks like a remote planet in a far Galaxy!
You can experiment with different channel swaps (for example RED and GREEN) and have fun! Look at what you can do with the examples of Figures 8, 9, 10 and 11.
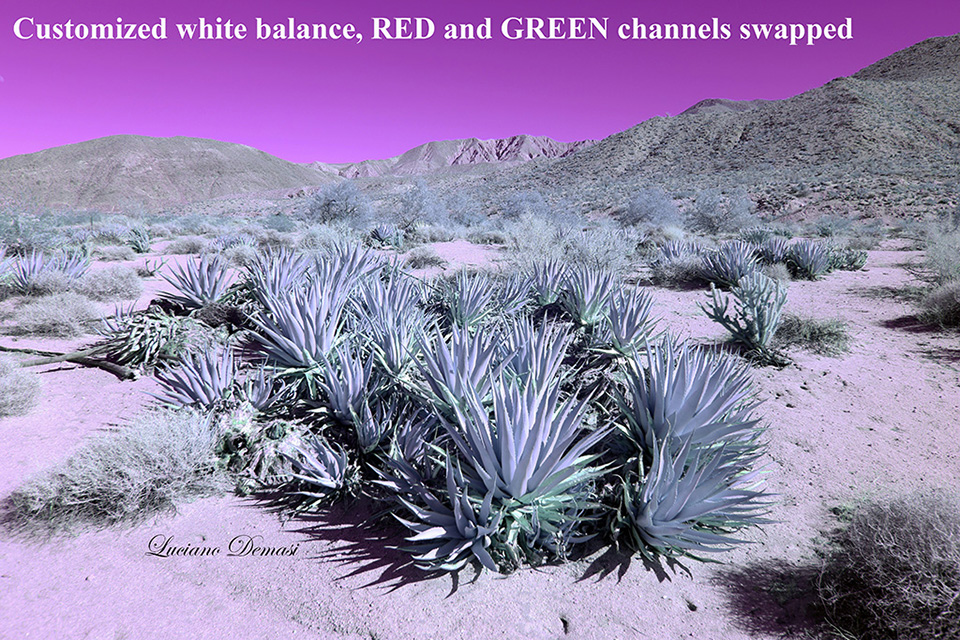
Figure 8
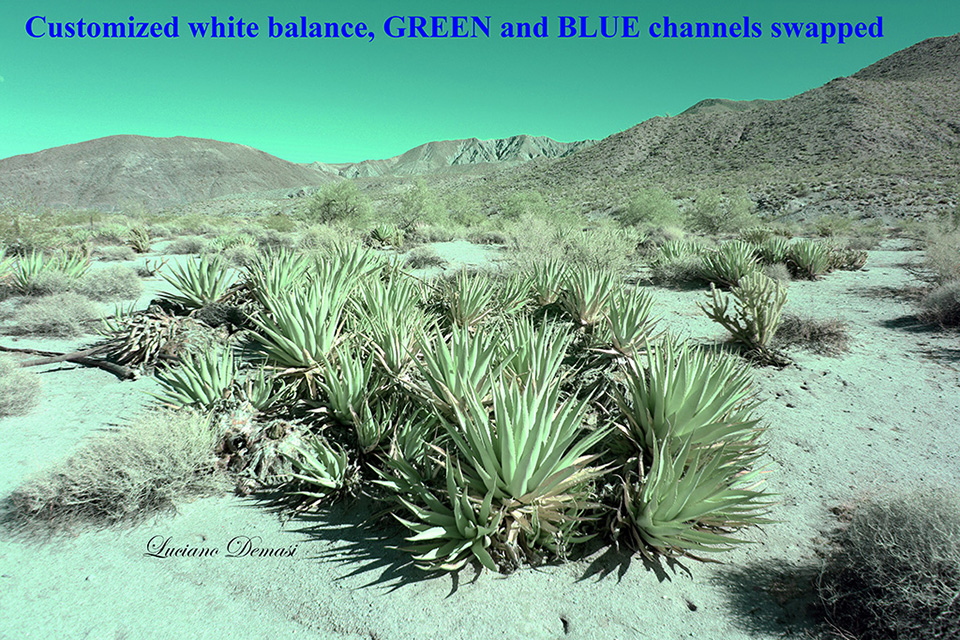
Figure 9
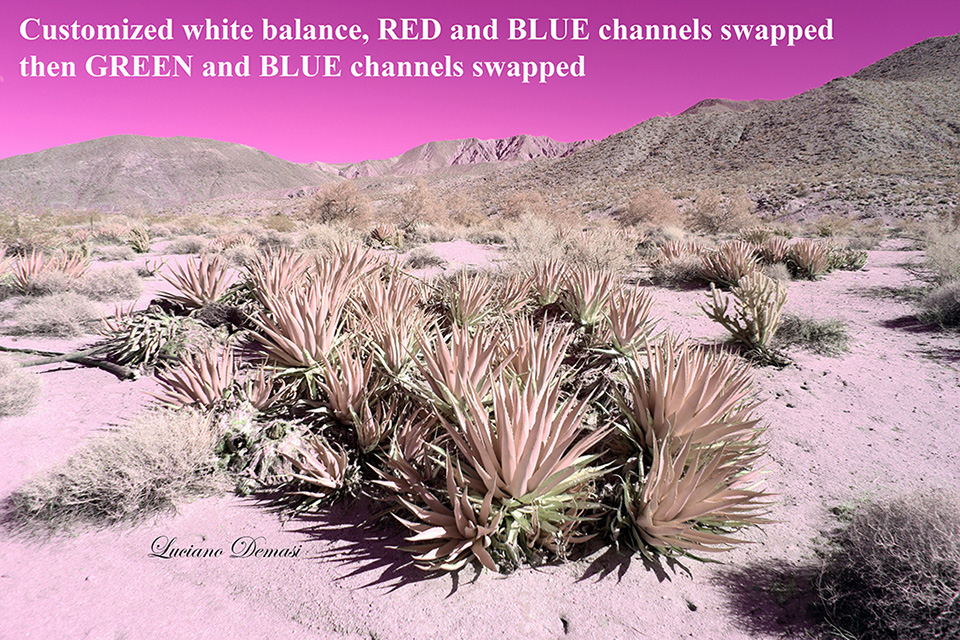
Figure 10
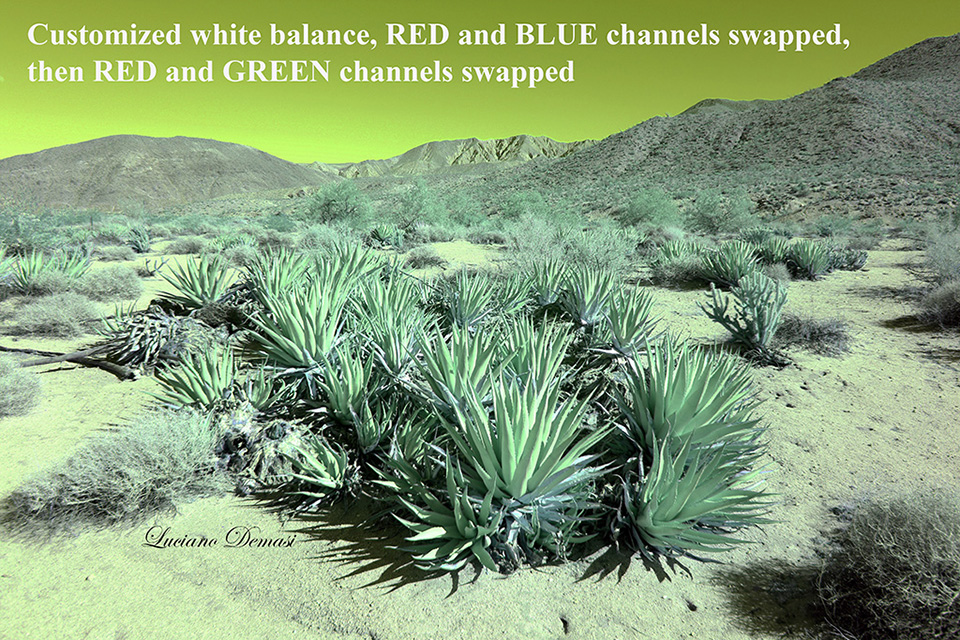
Figure 11
With the Hypercolor Infrared filter you can also have a huge freedom to get very nice black and white photos. For example, you can do a BLUE and RED channel swap and then with the Photoshop sequence “Image-Adjustments-Hue/Saturation…” and then instead of “Master” pick “yellows” and change the “Lightness”. You can make the yellows of Figure 7 darker or lighter and then convert in black and white (“Image-Adjustments-Black & White…” for stunning black and white photos (see Figures 12 and 13)!
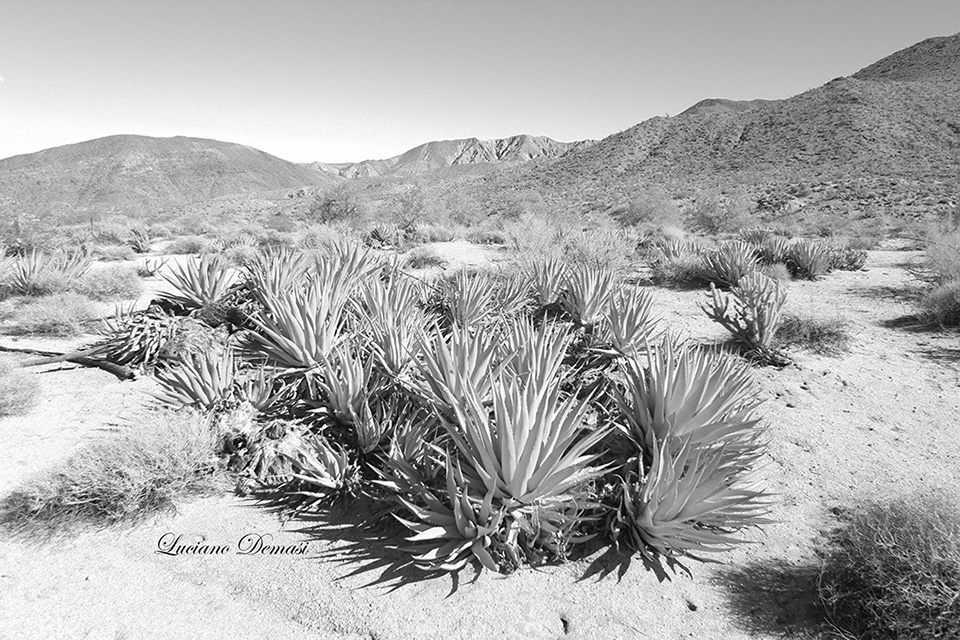
Figure 12
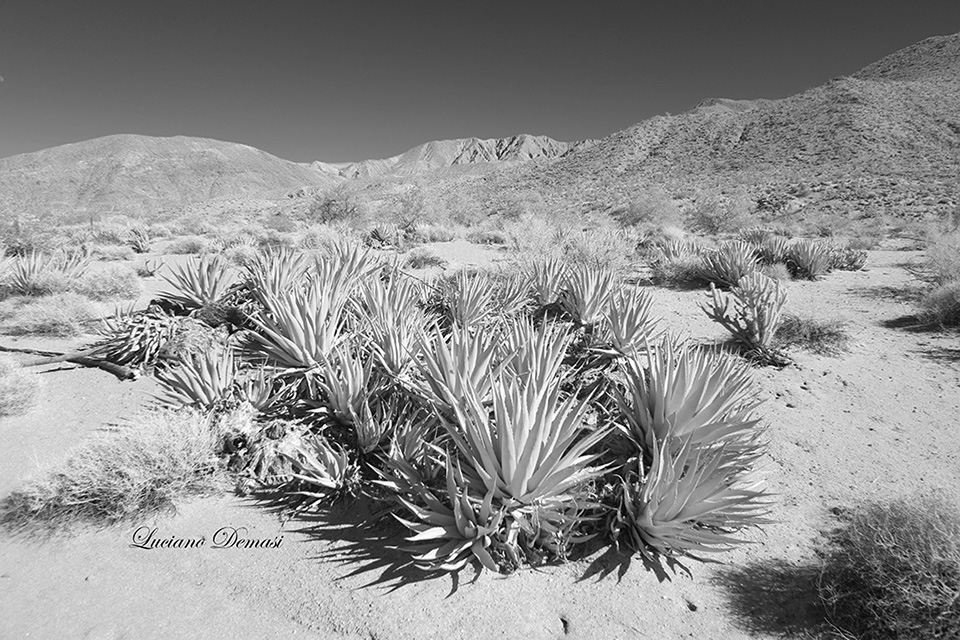
Figure 13
Returning back to the case of Figure 1, you can play with the postprocessing and get for example the image of Figure 14
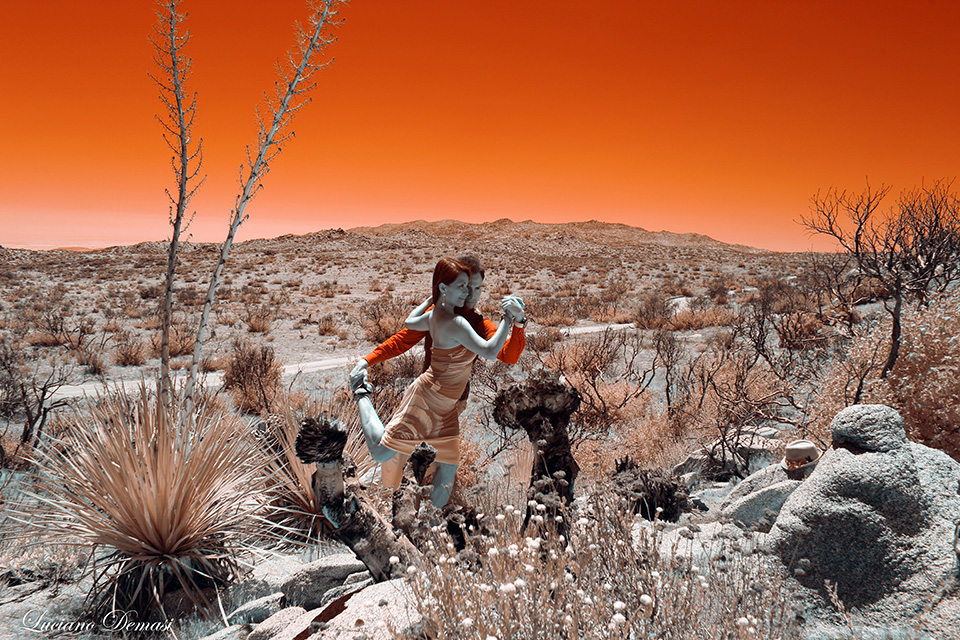
Figure 14
CONCLUSIONS
The Hypercolor Infrared filter has the following advantages you should consider:
• It produces a blue bright sky directly from the camera. No special postprocessing operations are needed
• It allows more light to hit the camera sensor. Thus, it allows lower ISO and higher shutter speed compared to other infrared filters such as the 720nm filter
• It is less likely to have a problem with your current lens equipment (hot spot)
• It has a large versatility of colors and effects, including black and white
Each moment is unique
…nature provides an immense and stunning endless beauty